How to Perform Honda
Element Valve Adjustment
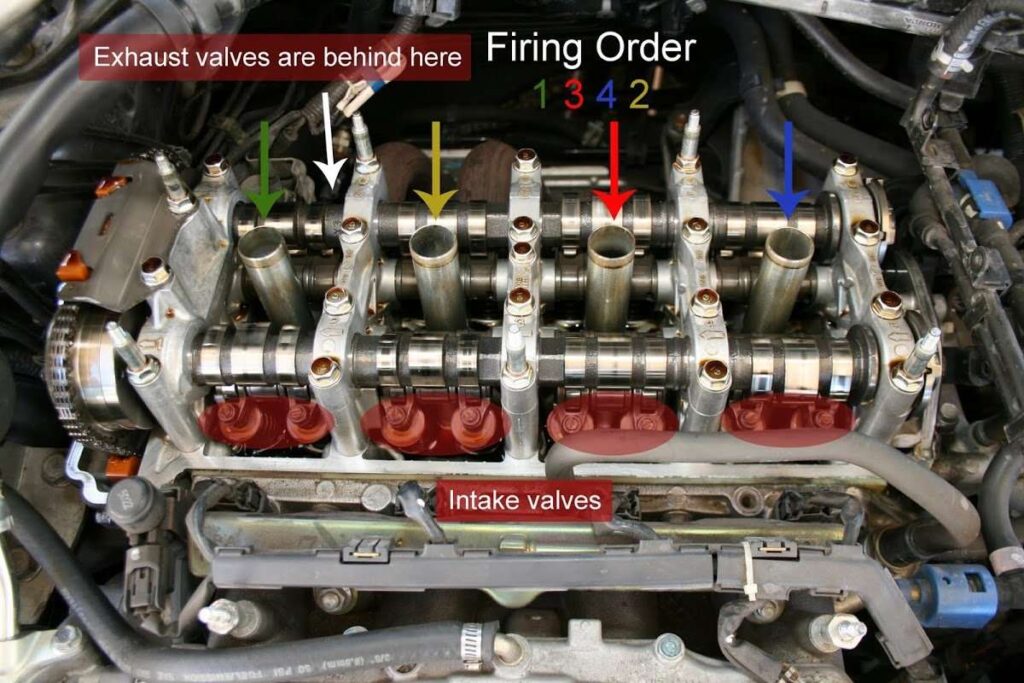
One crucial maintenance task for your Honda Element is adjusting the valves to ensure your k24’s longevity and performance. In this guide, we will be walking you through the process of adjusting the valves on a Honda Element. From gathering the necessary tools to troubleshooting common issues, this step-by-step guide will provide you with all the information you need to keep your Honda Element running smoothly. Whether you’re a seasoned mechanic or a first-time DIYer, this guide will make the task of adjusting your valves easy and efficient. So, keep your Honda Element in top shape by following this guide and learn how to adjust the valves like a pro! The Honda Element community has provided a lot of information online to perform a valve adjust and we have to thank them for their great expertise.
For a Honda K24 engine (such as those found in the Honda Element), the valve adjustment specifications are as follows:
- Lock Nut Size: The lock nut size for the valve adjustment on a Honda K24 engine is typically 10 mm.
- Torque Specification: The torque for the valve adjustment lock nuts is usually around 14 N·m (Newton-meters), which is approximately 10 lb·ft (pound-feet).
Valve Adjustment Procedure Overview:
- Preparation: Ensure the engine is cold. Remove necessary components to access the valve cover, such as the engine cover and any obstructions.
- Remove Valve Cover: Carefully remove the valve cover to access the valves.
- Rotate the Crankshaft: Rotate the crankshaft to set the engine at Top Dead Center (TDC) for the cylinder you are adjusting. The crankshaft can be rotated using a socket on the crankshaft pulley bolt.
- Check Clearances: Use a feeler gauge to check the valve clearances. The specified clearances can be found in the vehicle’s service manual. Typical specifications for intake valves are around 0.21 mm (0.008 in), and for exhaust valves around 0.28 mm (0.011 in), but always refer to the specific manual for precise measurements.
- Adjust Clearances: If adjustments are needed, loosen the lock nut (10 mm) and turn the adjustment screw to set the correct clearance using the feeler gauge.
- Torque Lock Nuts: Once the clearance is correct, hold the adjustment screw in place while tightening the lock nut to 14 N·m (10 lb·ft).
- Reassemble: Reinstall the valve cover and any components removed earlier.
Always refer to the specific service manual for your Honda Element’s K24 engine for exact specifications and detailed instructions, as procedures and specs may vary slightly based on model year and specific engine variant.

